Deploying on Hathora Cloud
This guide is intended to walk you through how to deploy a game on Hathora Cloud, dynamically provision compute for a room, and connect to it -- all in under 15 minutes.
Hathora services are available to use via two interfaces: web Console UI and command line interface (CLI). Both offer core functionality, so pick whichever you prefer.
- Console UI
- CLI
Access Hathora's developer dashboard here.
Learn how to install the CLI.
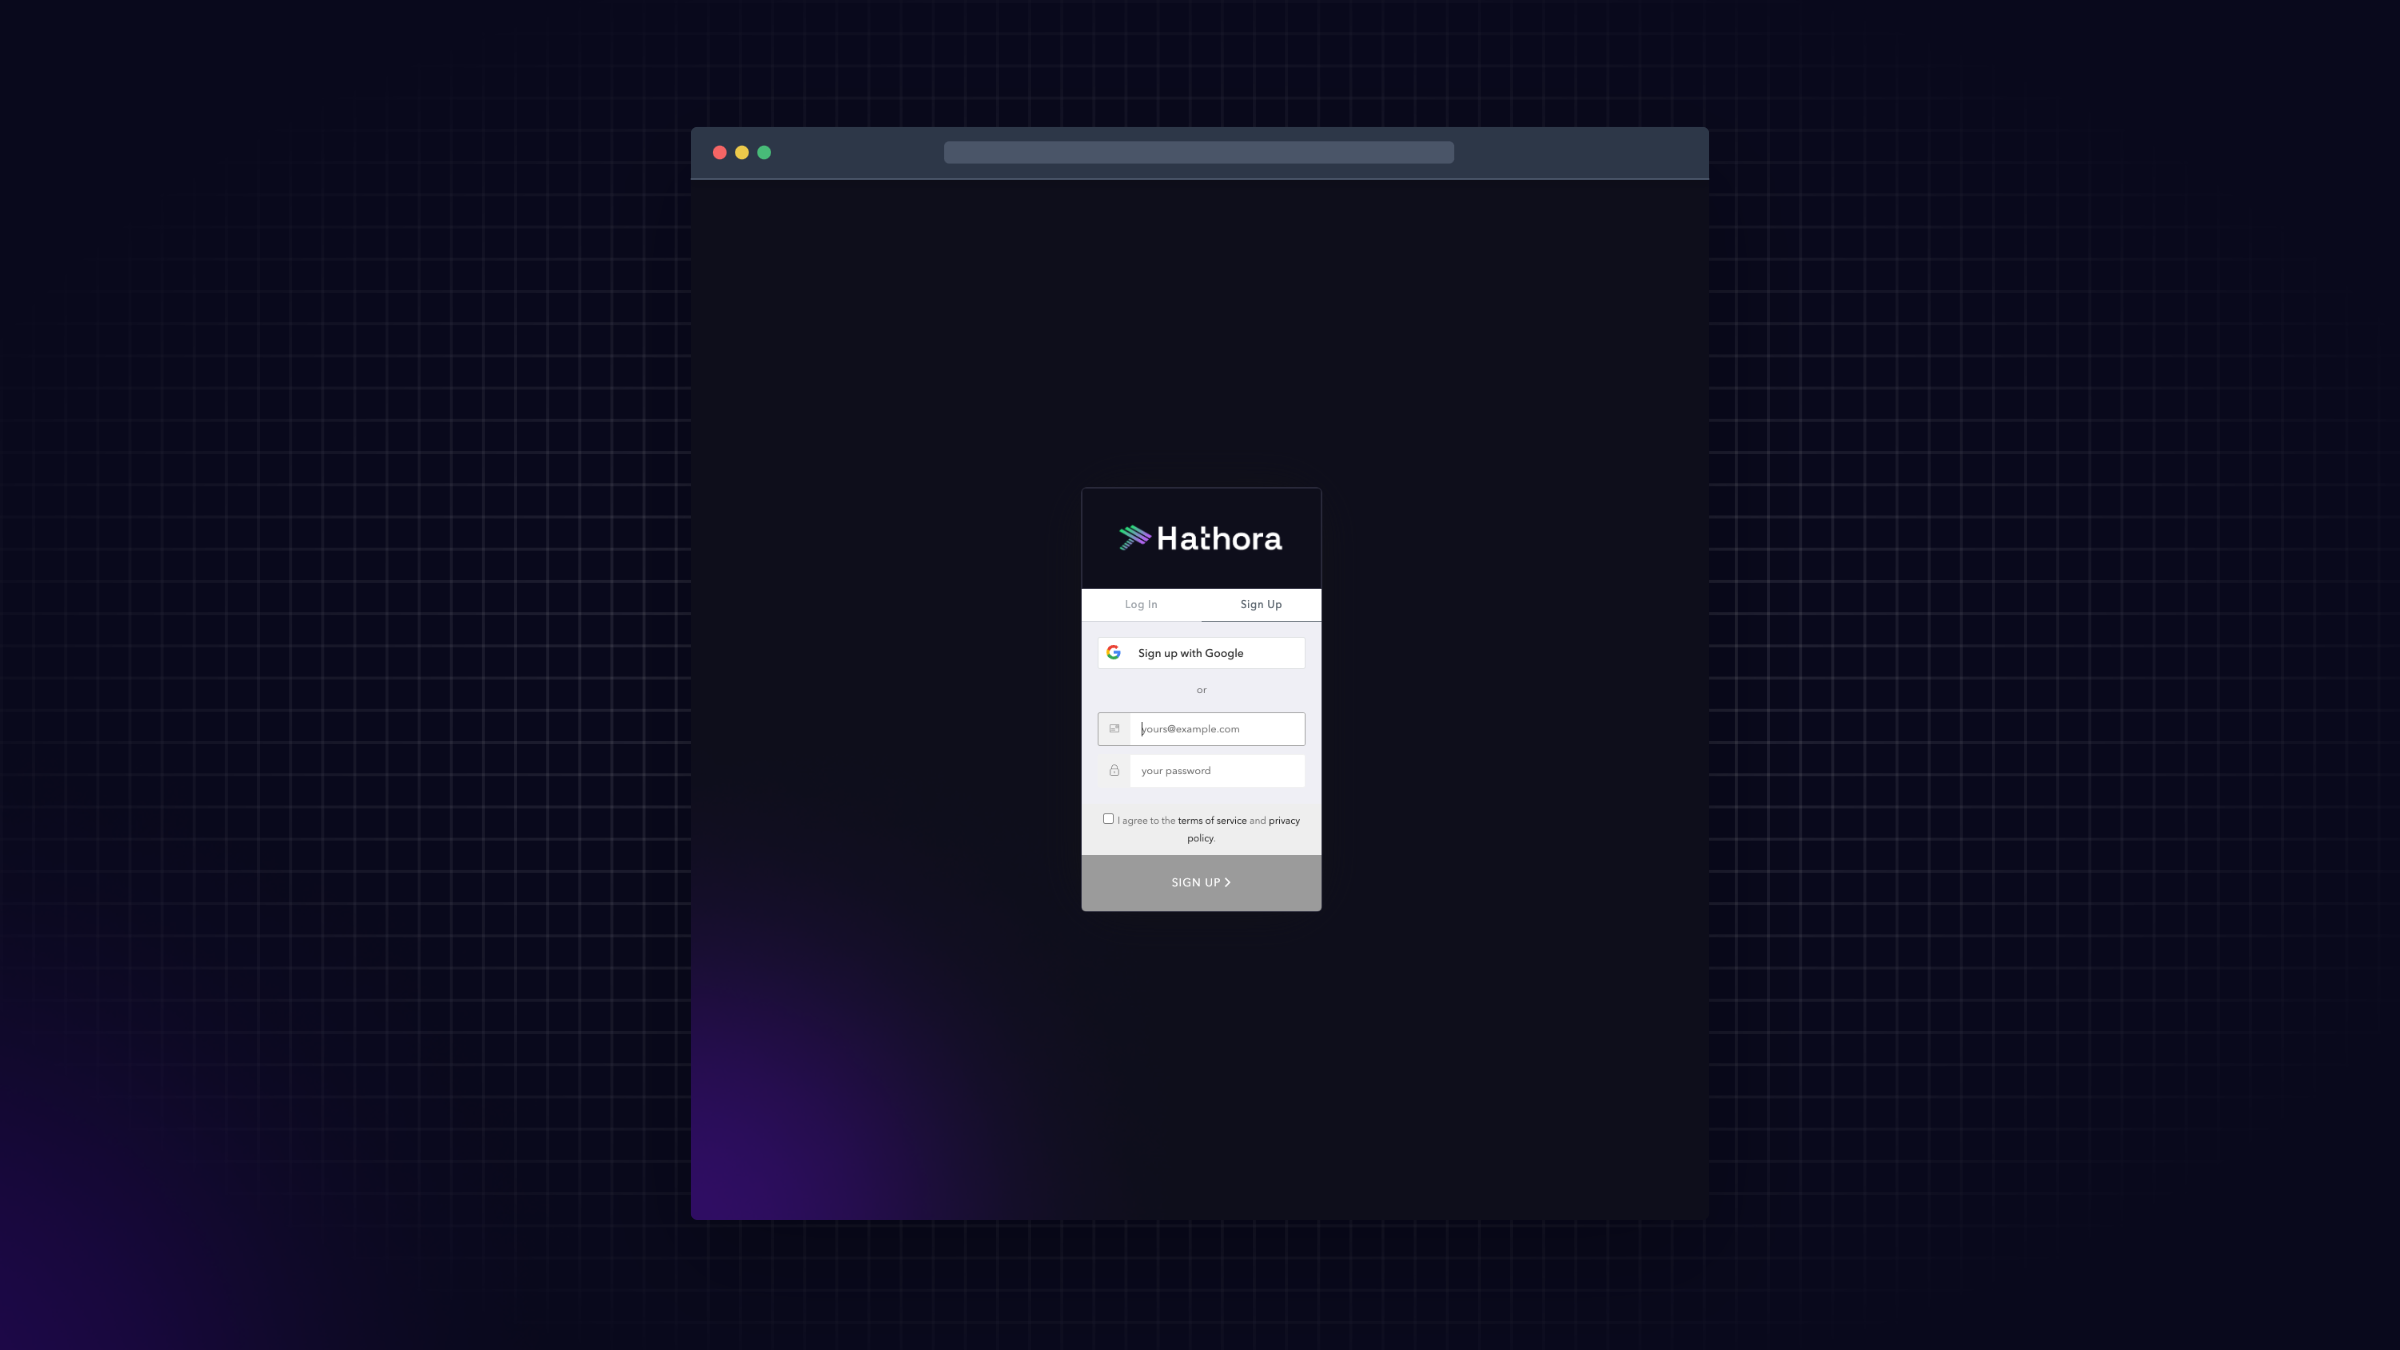
Make an account
Create an account using Google sign in or provide an email and password.
- Console UI
Create or login to Hathora.
Create an application
Once you're logged in, you are ready to create your first application.
- Console UI
Select the Create Application button and provide a name. Select Create to register your application.
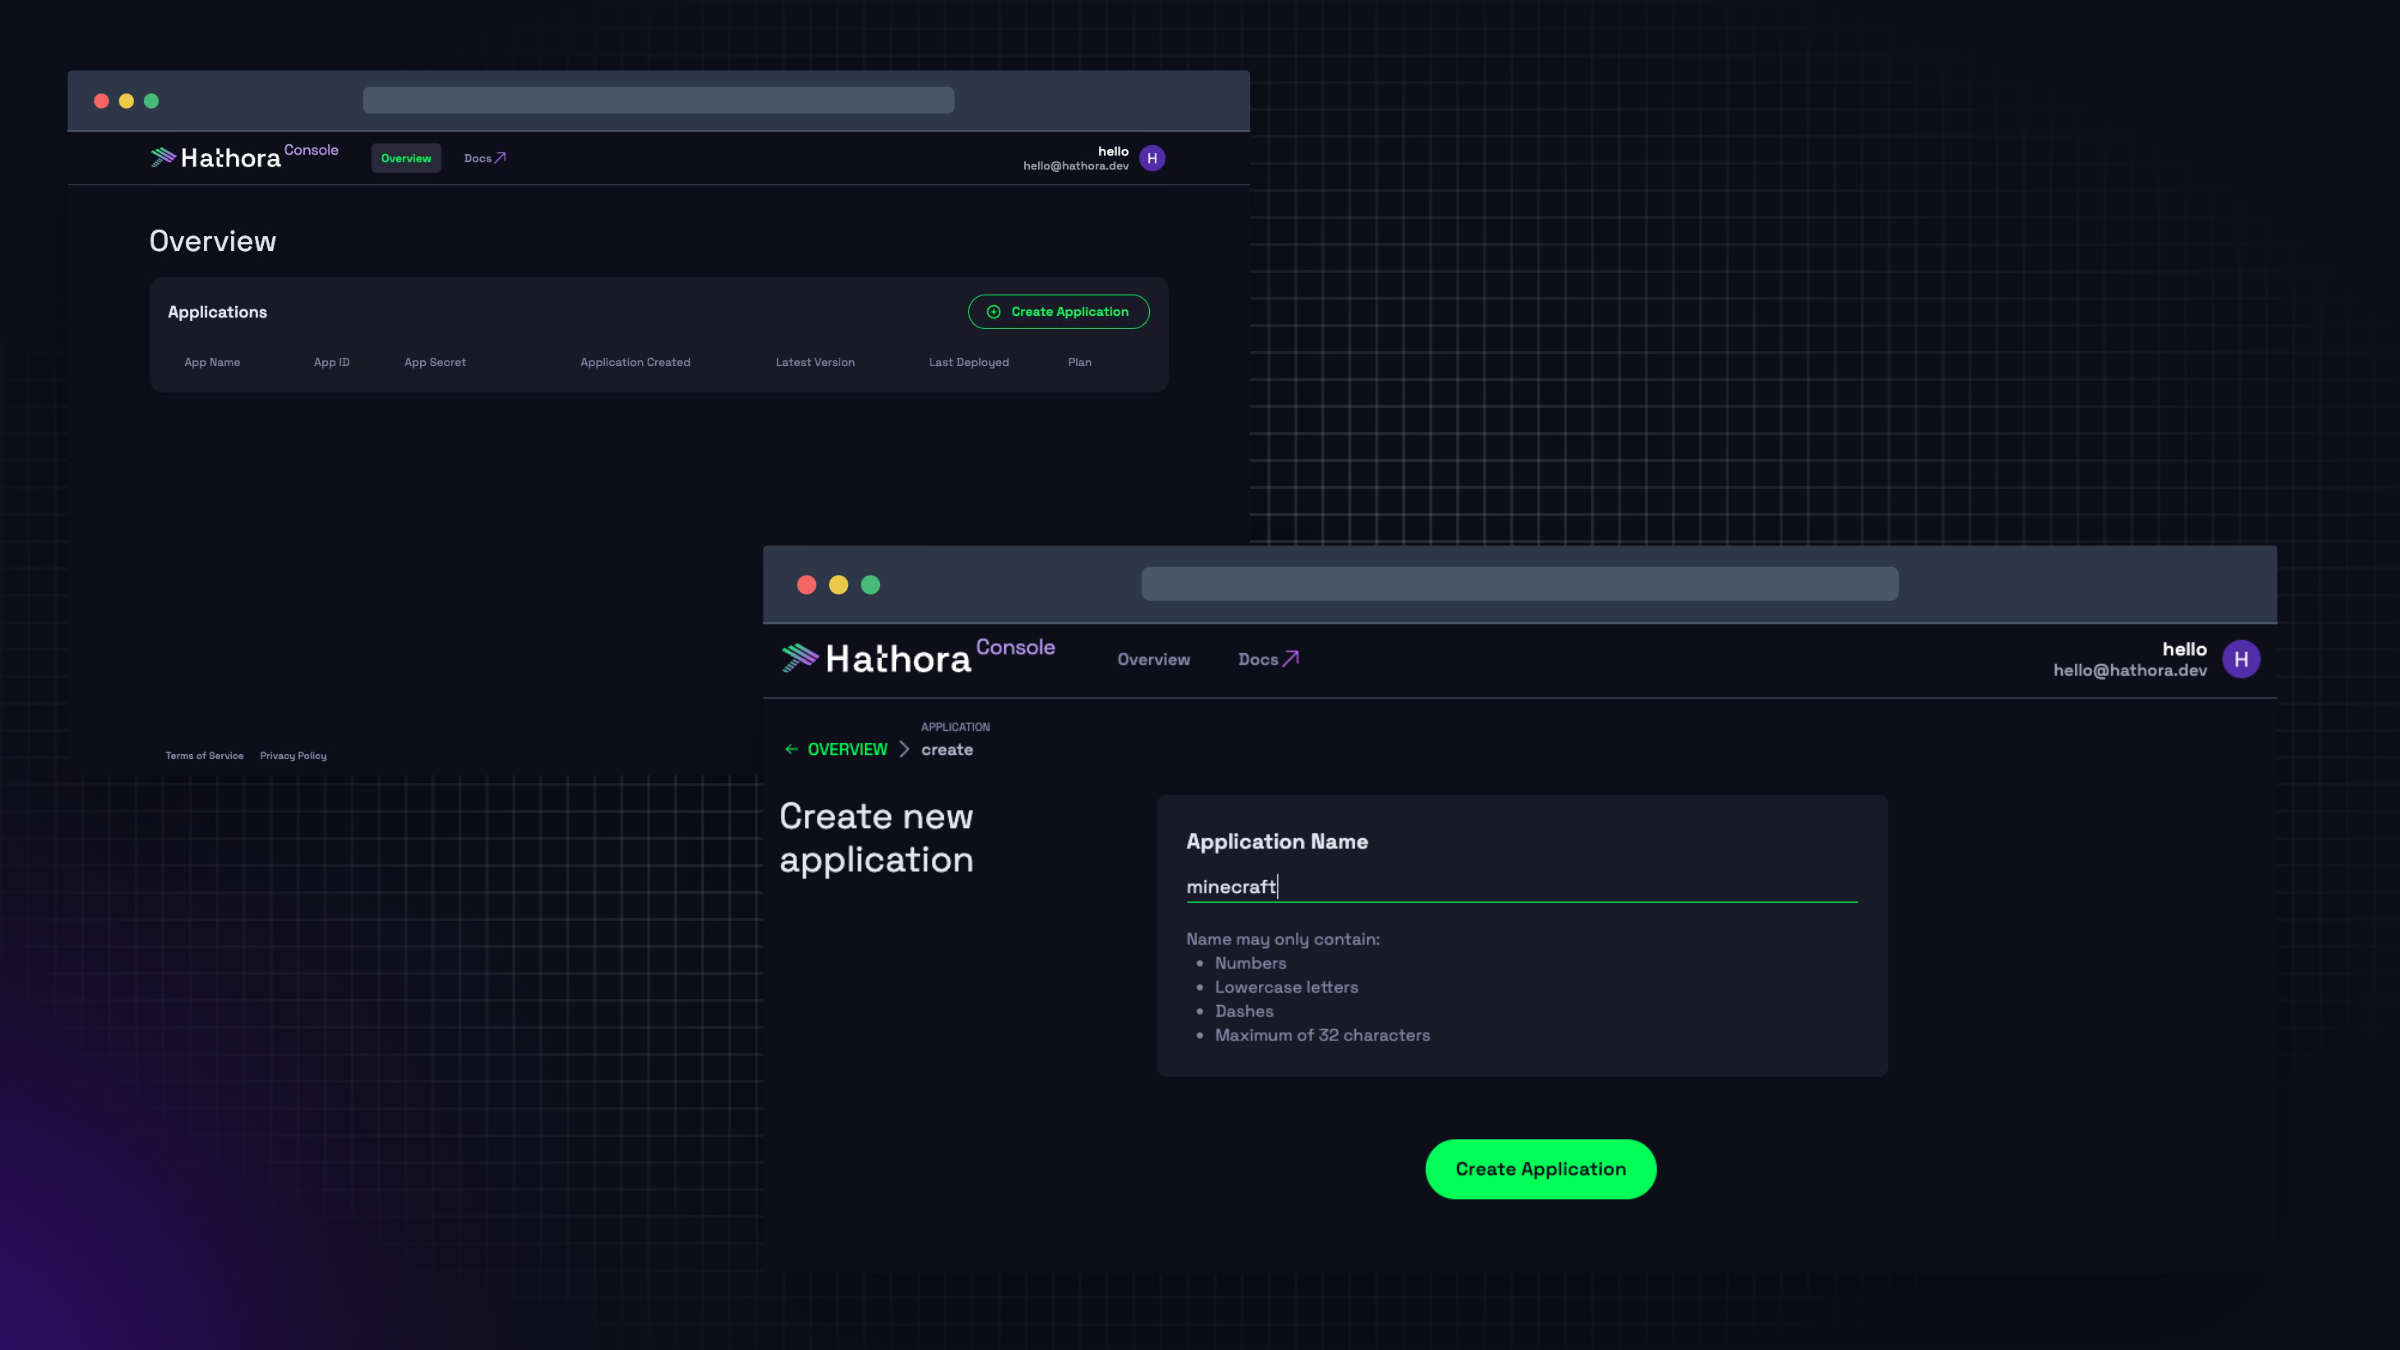
No two applications in your account can have the same name. An application name may only contain:
- numbers
- lowercase letters
- dashes
- maximum of 32 characters
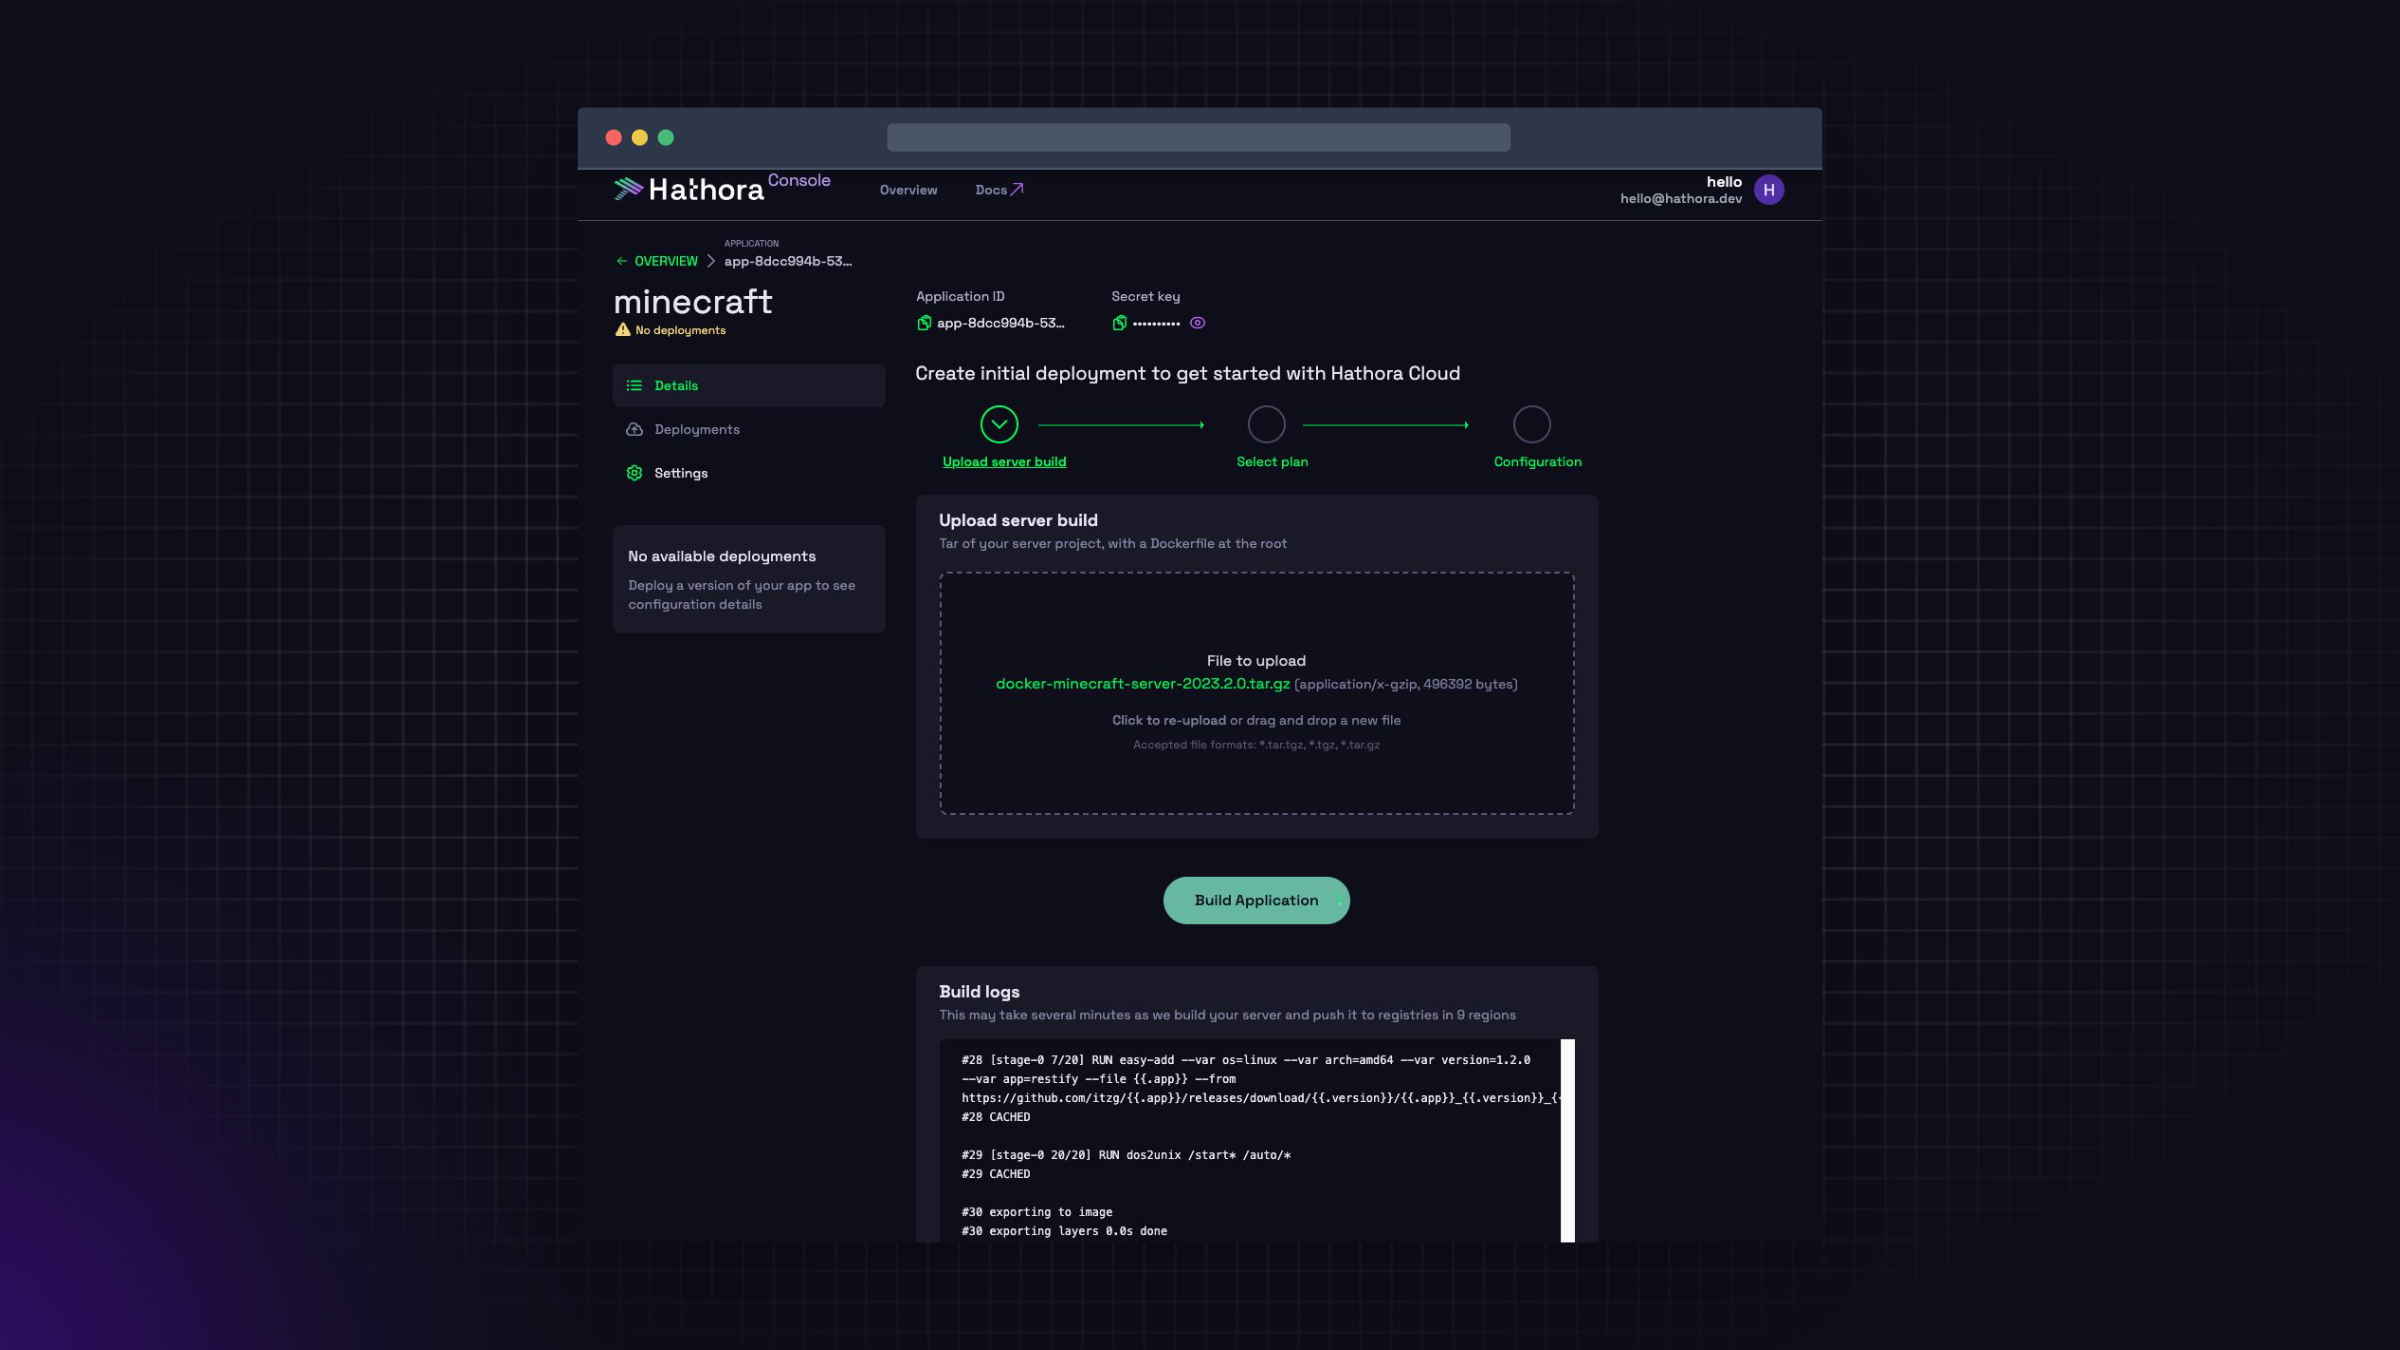
Deploy a server build
Provide the server build for your application with a Dockerfile in the root folder.
If you need help writing a Dockerfile for your project message us on Discord and we'll help you write one!
It can take several minutes to build a Docker image and push it to our global container registries.
To create a deployment here are the required fields:
appId: returned from create applicationfile: path to the tgz archive to deployroomsPerProcess: numberplanName: "tiny", "small", "medium", "large"transportType: "tcp", "tls", or "udp"containerPort: number
If you don't have your own project, download this .tgz file that we pulled from a public Minecraft repository. The rest of this guide will use the Minecraft example.
- Console UI
- CLI
Click to upload or drag and drop a server build into Upload server build. Next, click Build Application to start building your docker image. You can track the build logs below.
For Minecraft, upload the docker-minecraft-server.tar.gz file.
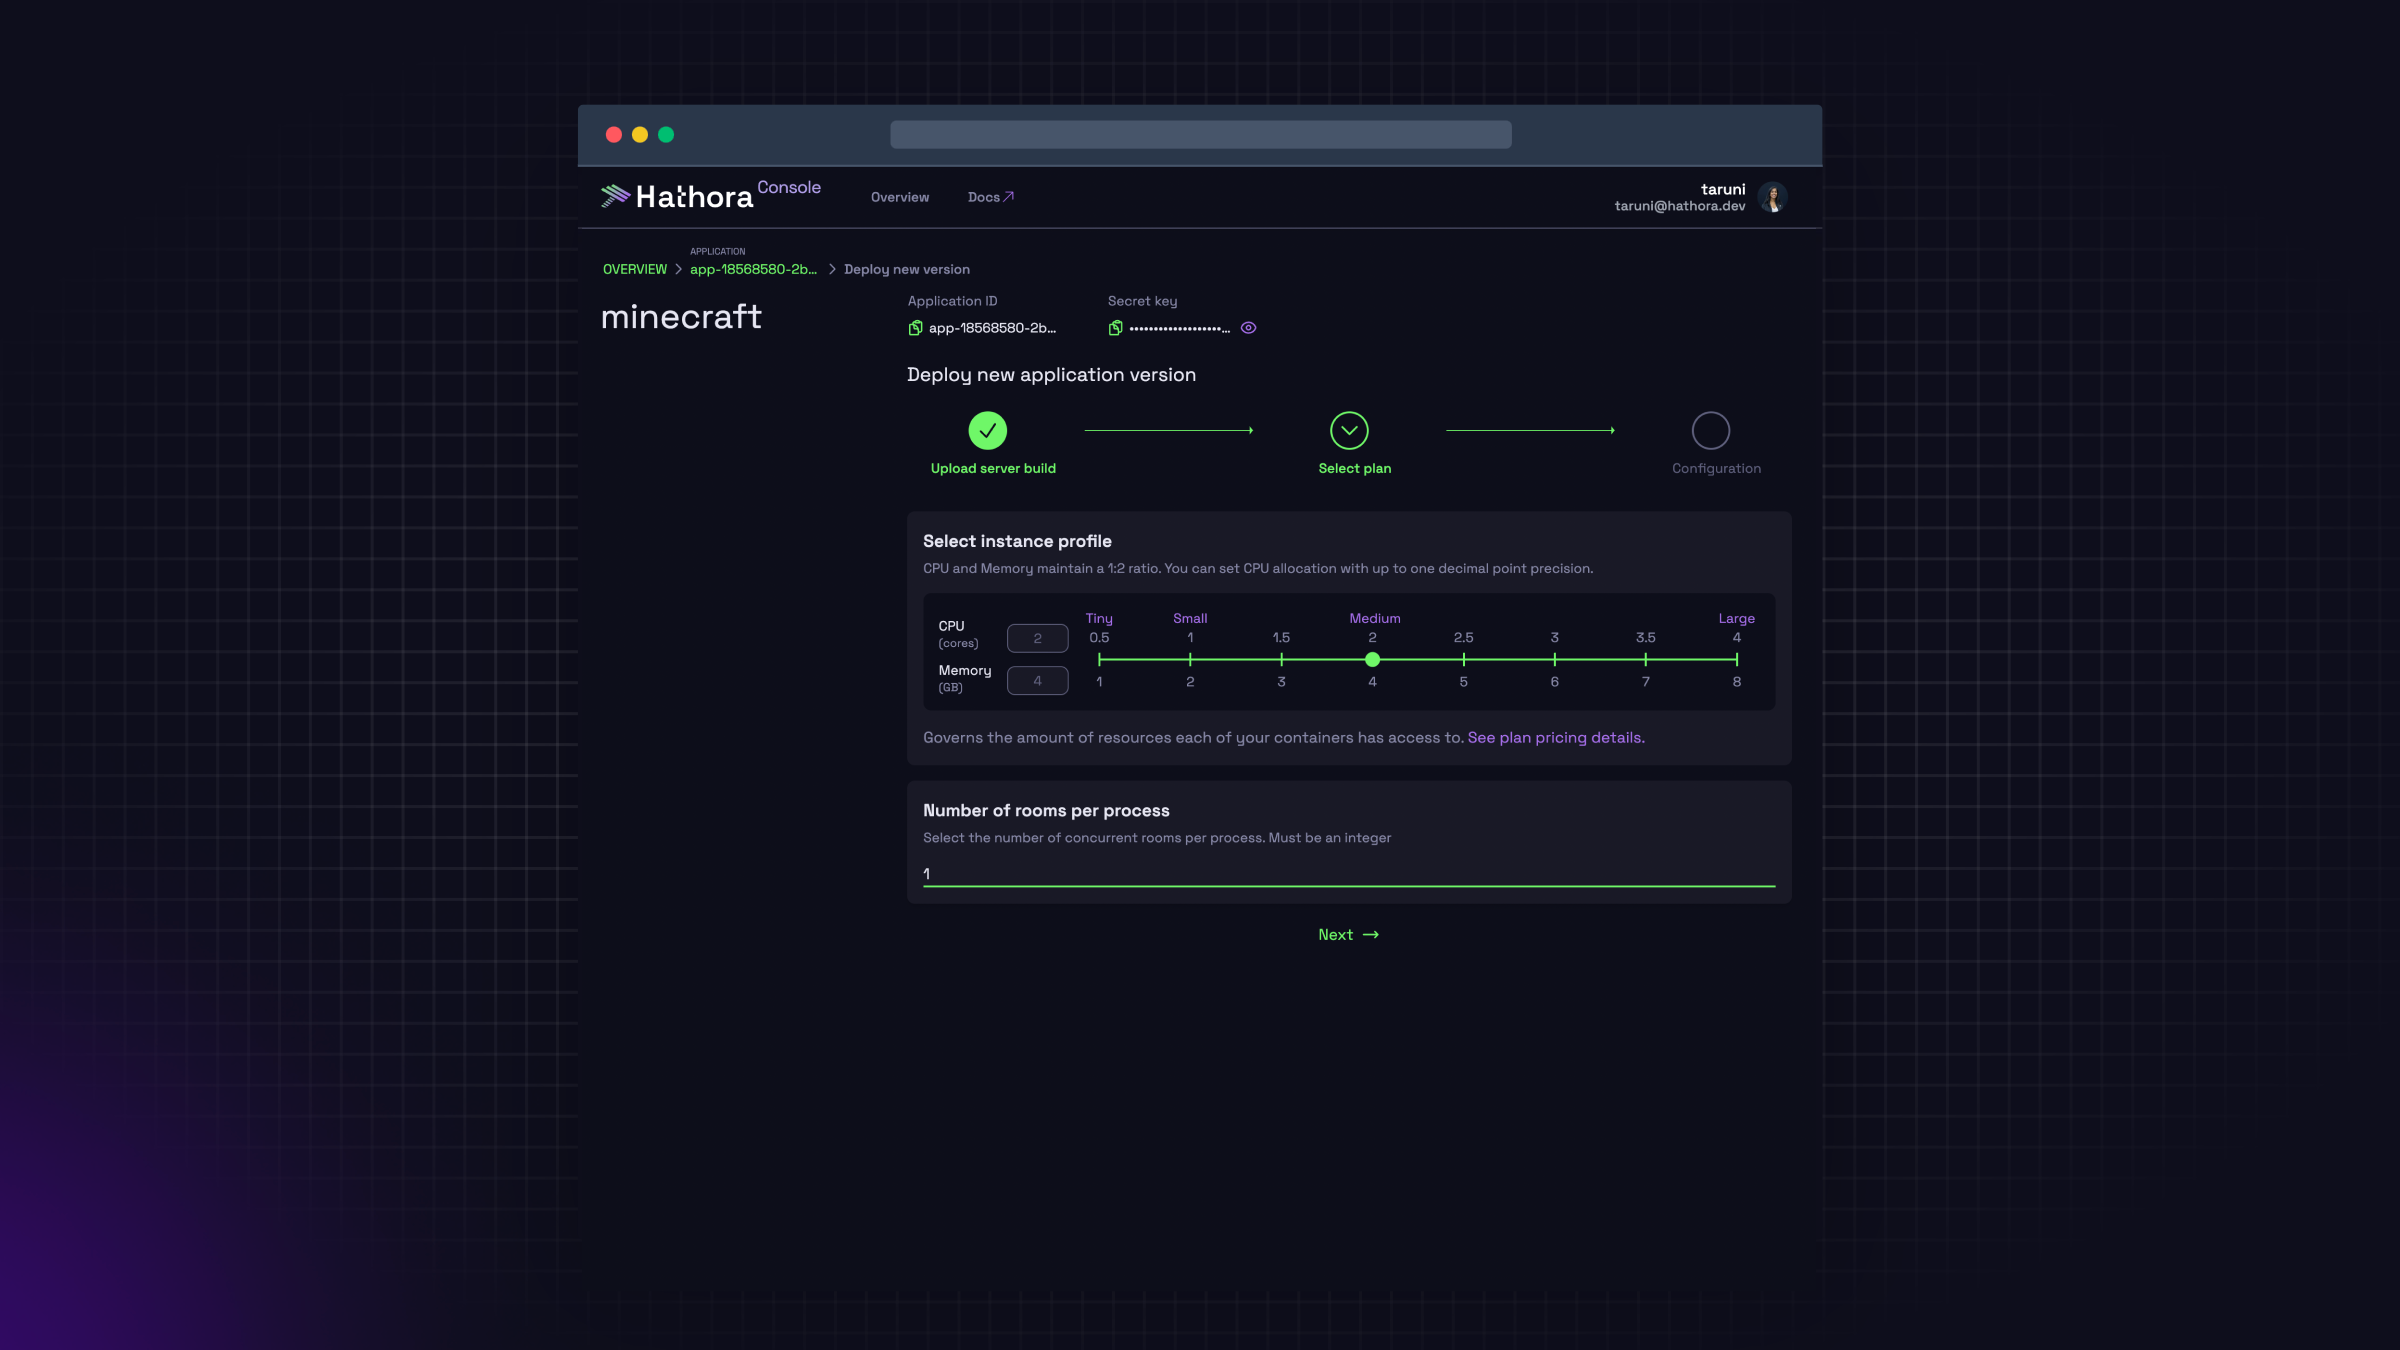
Select Instance profile and Number of rooms per process based on your server's needs
For Minecraft, set Instance profile to 2 cores/4 GB and Number of rooms per process to 1.
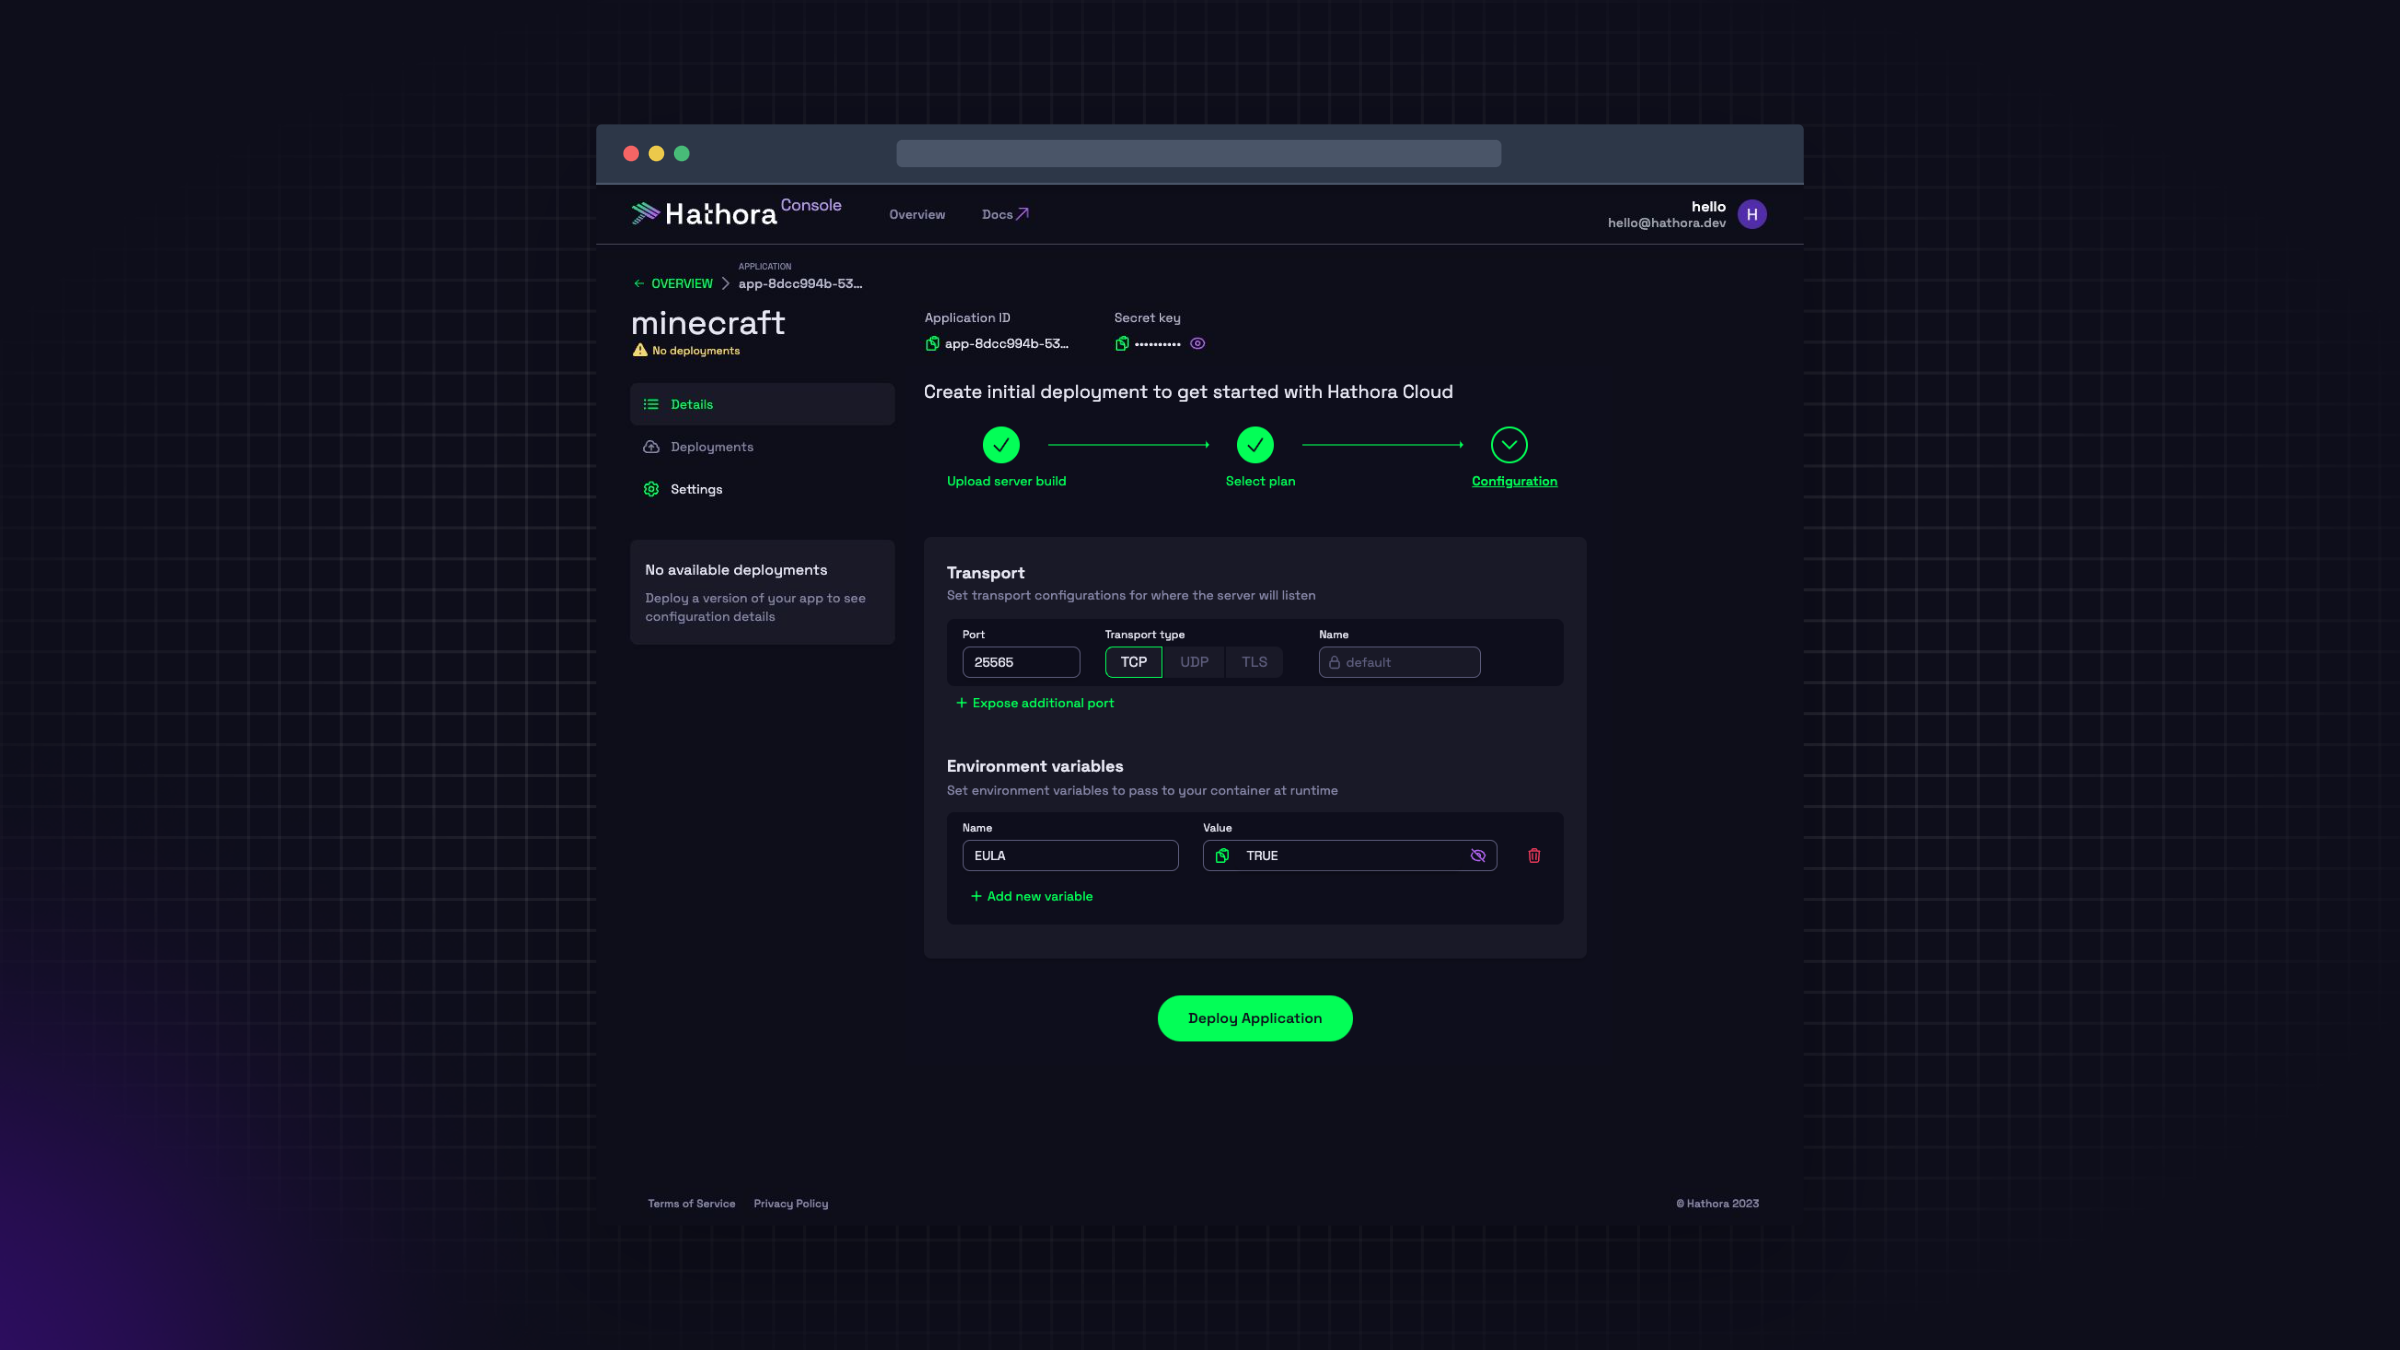
Provide Hathora with configurations for your server such as Container port, Transport type, and Environment variables.
Minecraft uses the following configurations:
- Container port as 25565
- Transport type as TCP
- A single Environment variable as Key = EULA and Value = TRUE
Use the command below to deploy your sever and provide the appropriate configurations. You will need to generate a developer token to execute the command.
Example values below are based on Minecraft server.
hathora deploy \
        --file /Downloads/docker-minecraft-server-2023.2.0.tar.gz \
        --rooms-per-process 1 \
        --container-port 25565 \
        --transport-type tcp \
        --requested-memory-mb 4096 \
        --requested-cpu 2 \
        --env EULA=TRUE \
        --app-id $APP_ID \
        --token $HATHORA_TOKEN
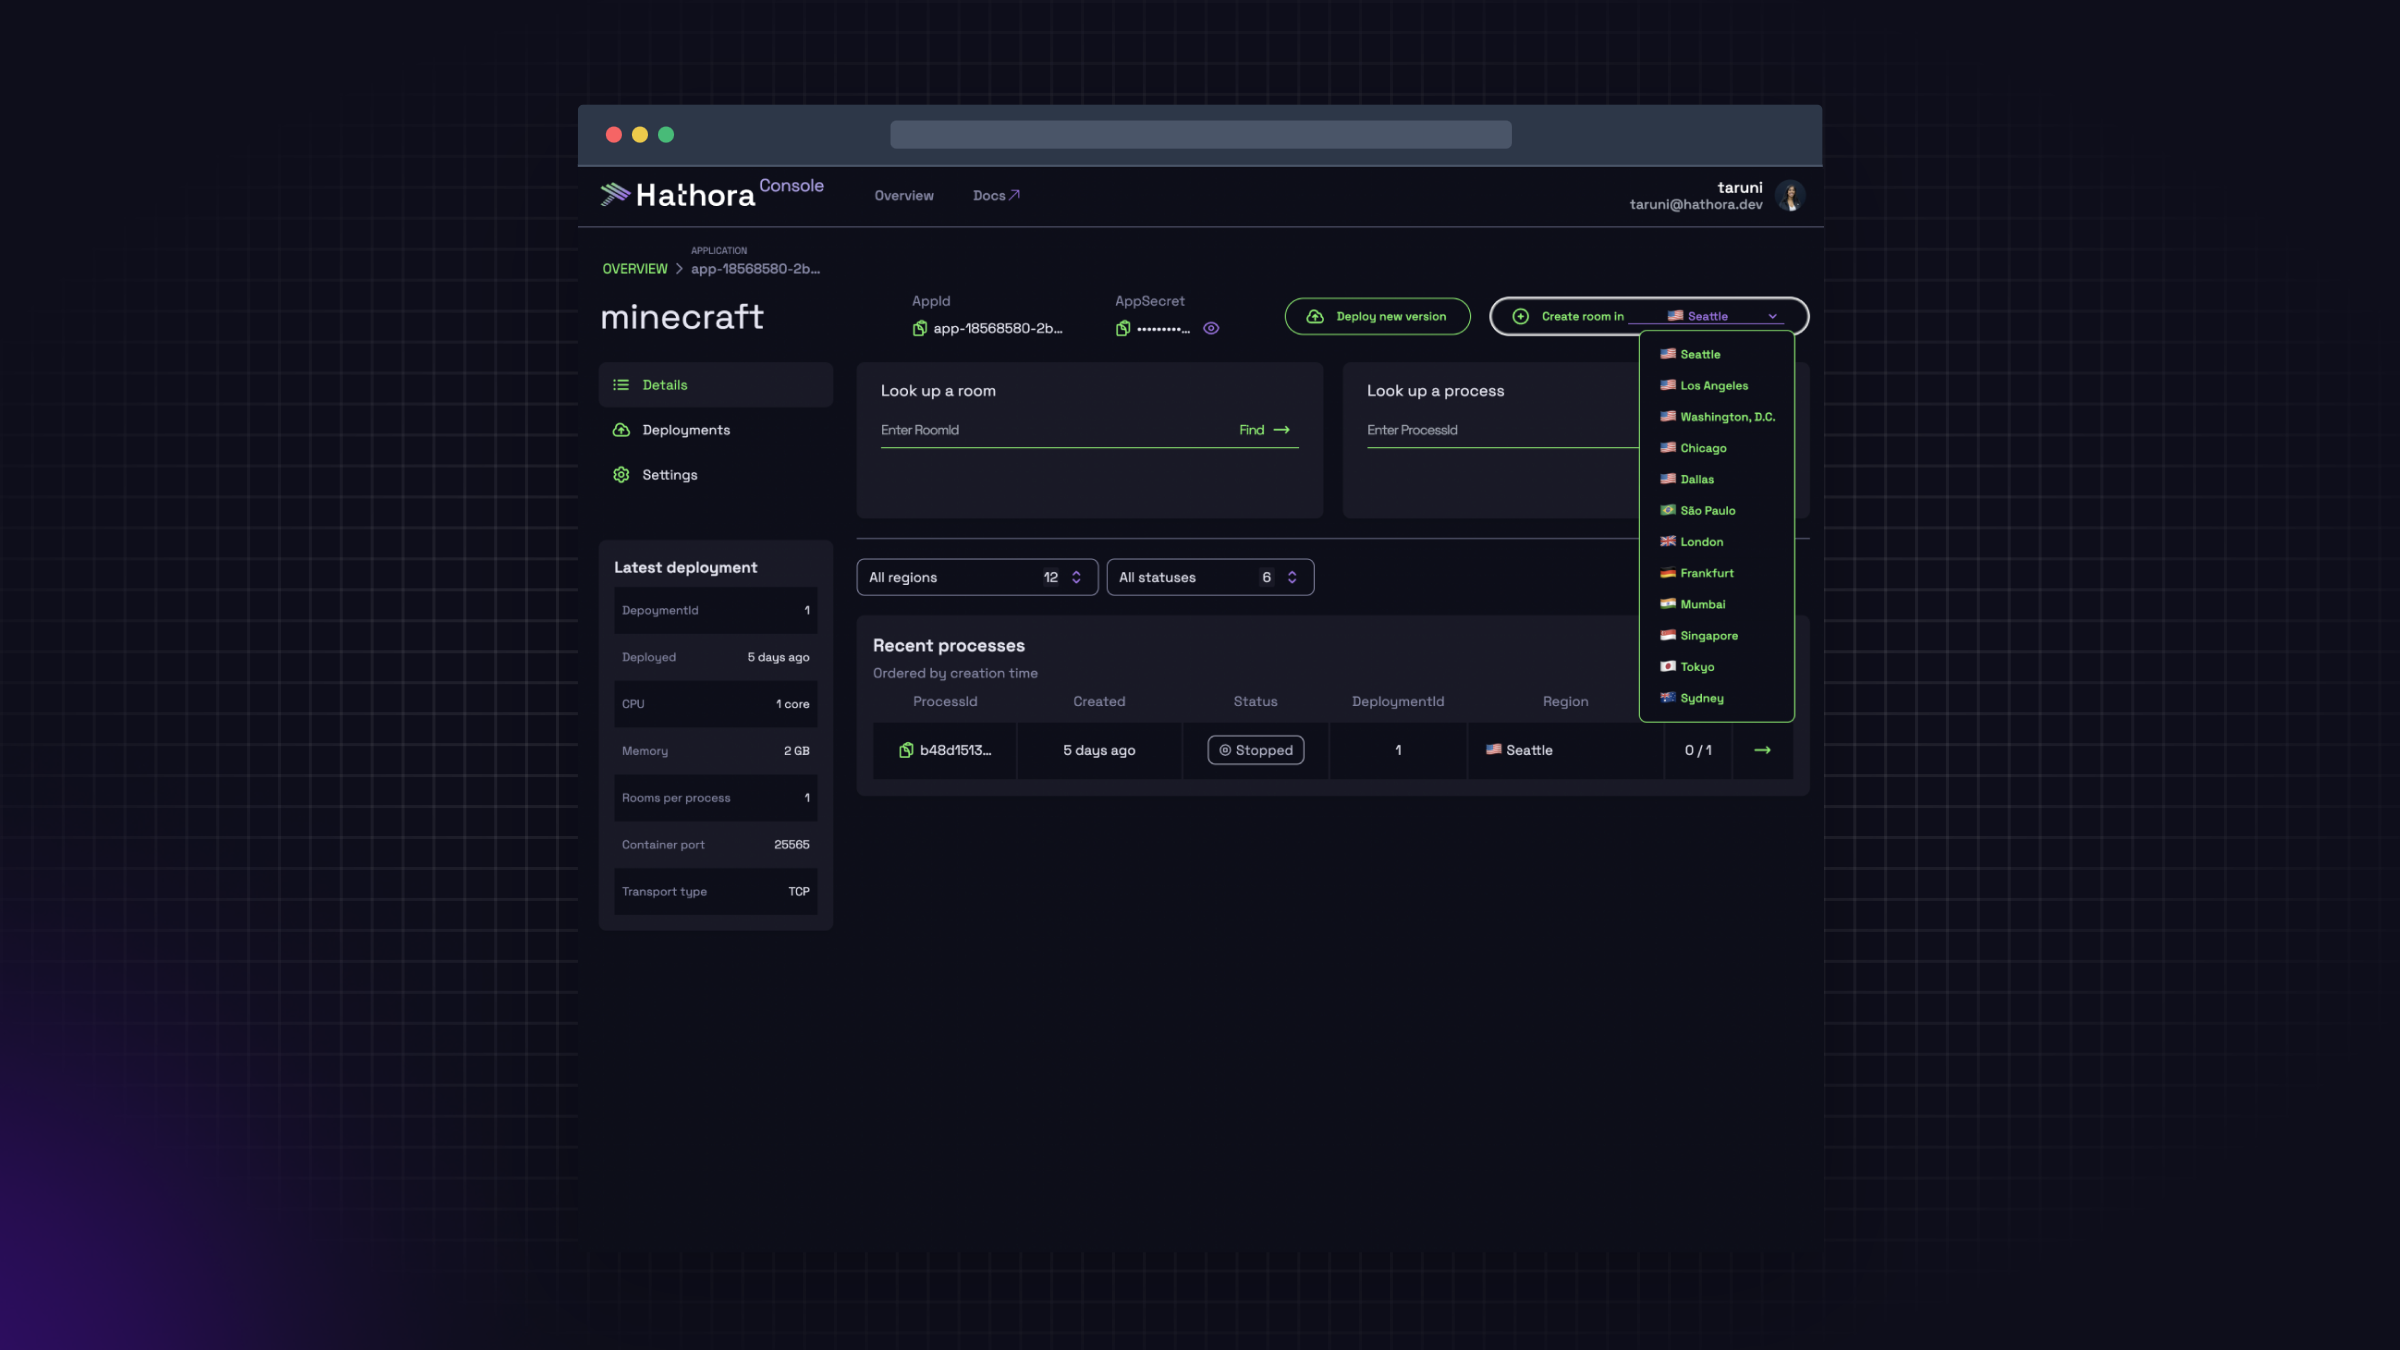
Create a room
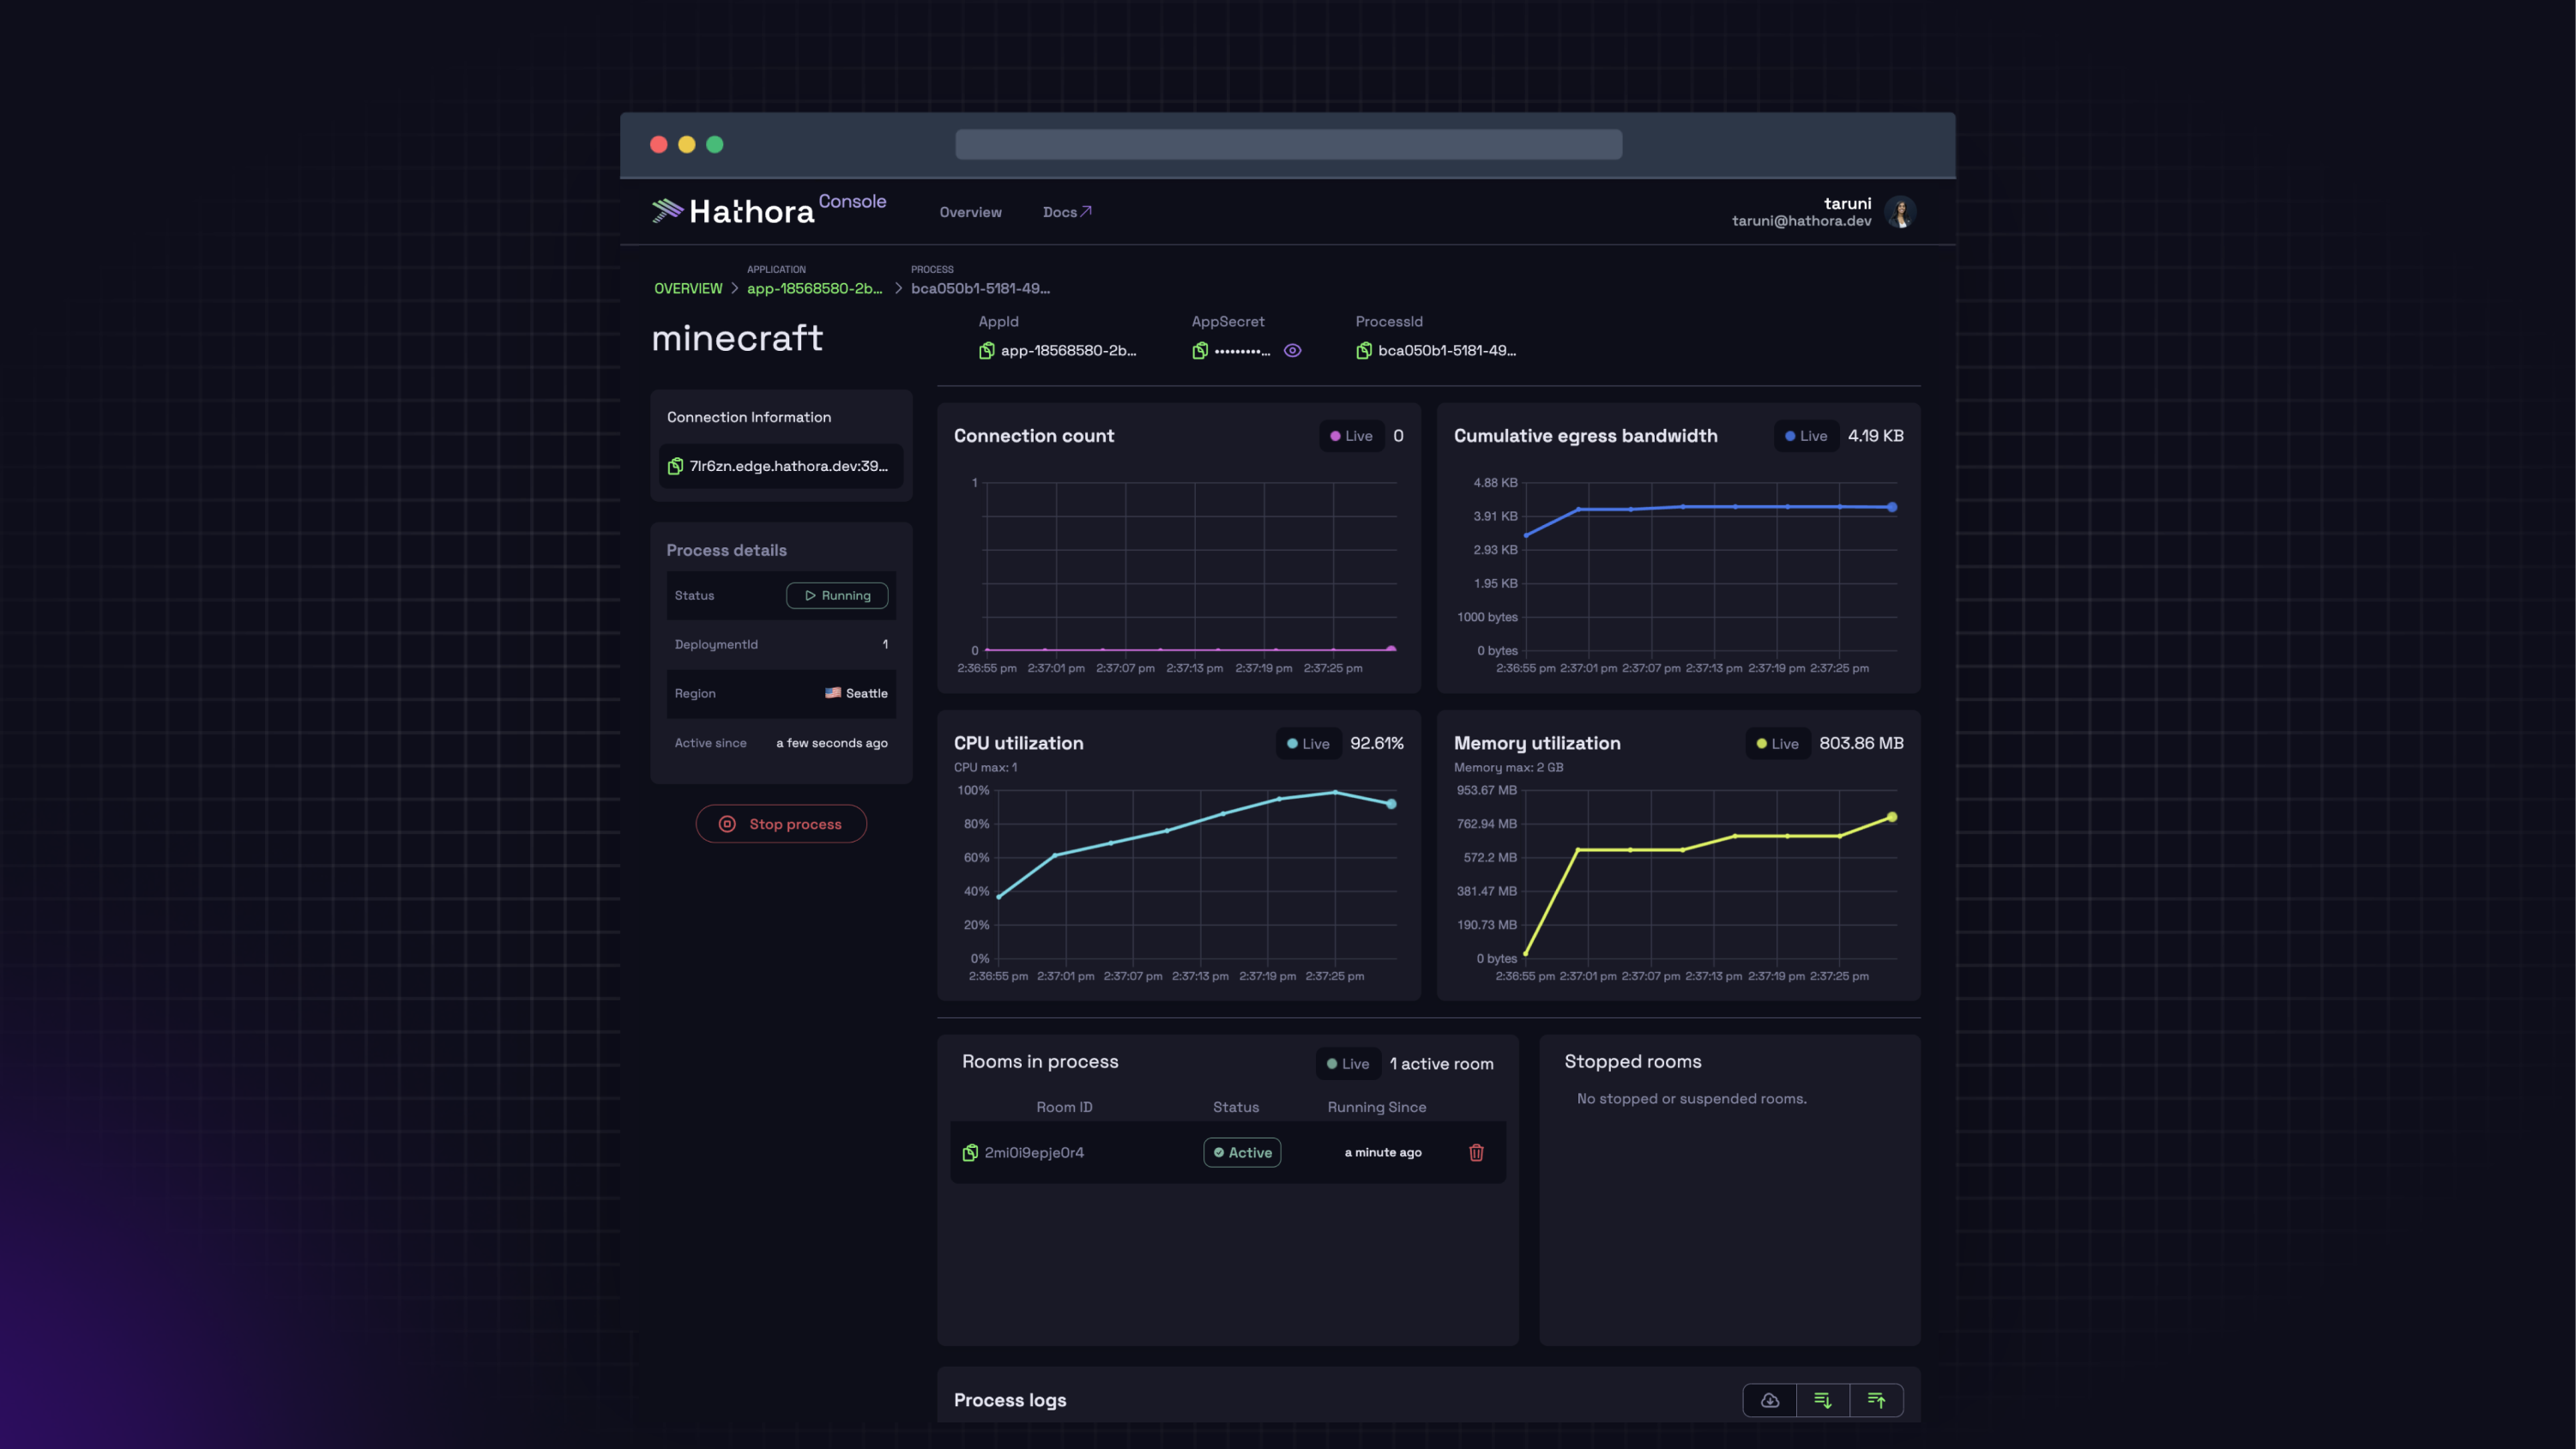
After successfully deploying your server build, create a room to provision your first game server instance.
Normally a lobby or matchmaker service will be used to programatically call createRoom. However, for testing, you can call it manually through the Console UI/CLI.
To create a room, you must specify which region it'll be created in.
- Console UI
Click the create room dropdown and select the region to create the room in. A room will spin up and appear in the Active Processes table in less than 30 seconds.
Connect your client
In order to connect to a specific room, you will need to look up its connection details and get the host and port where it's reachable.
- Console UI
From the Active Processes table, click on the Details button to navigate to the Process details page. Here you can copy the Connection Information.